Blog
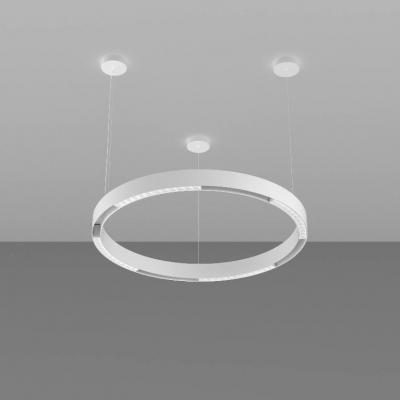
Choosing an ETL Magnetic Track Lighting System for North American Projects


Architects and interior lighting specifiers have a simple mandate with a complicated path: select a magnetic track system that looks great, performs as designed, and clears plan review and field inspection without drama. This guide gives you a compliance‑first, decision‑maker overview of ETL magnetic track lighting so you can write tighter specs, assemble airtight submittals, and minimize rework risk in the U.S. with a brief note on Canada where relevant.
Will an AHJ accept ETL for magnetic track lighting
Yes—when the equipment is within the scope of its listing and installed per the manufacturer’s instructions, Authorities Having Jurisdiction typically accept the ETL Listed Mark alongside other marks from OSHA‑recognized Nationally Recognized Testing Laboratories. OSHA explains the program and recognized labs on the official NRTL page, which establishes parity among NRTL marks for workplace safety acceptance; Intertek is one of those labs and details what the ETL Listed and cETLus marks signify for the U.S. and Canada. See the acceptance framework at the sources below:
OSHA’s overview of the Nationally Recognized Testing Laboratory program confirms recognition of multiple labs and the basis for acceptance: OSHA NRTL Program and recognized labs.
Intertek’s explanation of the mark and U.S./Canada acceptance clarifies ETL and cETLus usage: ETL Listed Mark acceptance and guidance and U.S. and Canada acceptance context.
The bottom line for specifiers is straightforward: require an NRTL mark such as ETL, verify the exact model numbers and system components in the public directory, and bind acceptance to installation per the listing and labeling.
How listing labeling and NEC 110.3B fit together
Think of compliance as a three‑link chain: listing, labeling, and installation. The NRTL listing establishes what the product was evaluated against. The labeling places the mark and essential ratings on the equipment. NEC 110.3(B) then makes the manufacturer’s instructions part of the enforceable conditions of installation—so drawings, specs, and field work must follow them. You don’t need to quote code articles in the spec, but you do need to reference the listing and the instructions explicitly so plan reviewers and inspectors can connect the dots. For the code context, consult the official landing for NFPA 70 and its sections, including 110.3(B), via the publisher: NFPA 70 National Electrical Code landing.
Class 2 and magnetic track essentials for spec writers
Many modern magnetic track systems are low‑voltage DC architectures using Class 2 power. Class 2 power units are inherently power‑limited to reduce shock and fire risk; for constant‑voltage LED systems this typically means low‑voltage outputs with defined current and wattage limits. UL publishes the standard governing Class 2 power units, and it is often the anchor for LED drivers that feed track buses. See the standard overview here: UL 1310 Class 2 Power Units.
How does that translate to spec language and layout decisions for ETL magnetic track lighting?
System evaluation and components. Complete low‑voltage lighting systems may be evaluated to UL 2108, while LED components and control gear are commonly evaluated to UL 8750. Include these standard references in your product descriptions when they apply. Standard overviews: UL 2108 Low Voltage Lighting Systems and UL 8750 LED Equipment.
Voltage and run length. At 24 V DC, voltage drop becomes noticeable over long runs; 48 V DC buses generally support longer continuous runs for the same load within Class 2 limits. Use higher bus voltage where the system listing and accessories support it, and break large layouts into multiple Class 2 segments.
Circuit classing. Most LED load and control circuits in these systems are Class 2. NEC Article 725 governs separation from Class 1 conductors and conditions that allow or prohibit mixing in the same raceways or enclosures. Educational guidance on segregation is widely published for inspectors; see the International Association of Electrical Inspectors portal for topical articles: IAEI resources on Class 2 segregation.
Selection framework for decision makers
This section gives you a practical lens to choose an ETL magnetic track lighting system that will clear review and perform to intent. Use it to shape spec notes and pre‑screen submittals.
Certification and labeling
Lead with the mark and the scope. Require ETL or equivalent NRTL listing on the track, adapters, luminaires, and drivers with clear model‑level traceability. When projects cross the border or submittals anticipate Canadian review, require cETLus where applicable and note Canadian Electrical Code adoption in the jurisdiction. Identify the exact standards—UL 2108 for the system where evaluated, UL 8750 for LED equipment, and UL 1310 for the Class 2 power unit.
Call for the public directory page in the submittal and confirm that installation instructions referenced by the listing are the same ones included in the package. Intertek provides a searchable public database so you and the AHJ can confirm models and scopes directly: Intertek ETL public directory.
Electrical topology and driver strategy
Two common patterns dominate magnetic track systems—integral drivers built into each module and remote drivers feeding segments of the track. Each approach has acceptance and maintenance implications you should weigh before selection.
Driver approach | What it means | When it helps | What to watch |
|---|---|---|---|
Integral drivers in luminaires | Each module contains its own driver and connects to a low‑voltage track bus | Small to medium installs, simplified replacement, less remote gear | Thermal limits in modules, dimming uniformity across mixed drivers, driver listing scope |
Remote Class 2 drivers | One or more power units feed track segments via Class 2 DC | Long runs, tighter current management, centralized access | Enclosure rating and location per instructions, voltage drop on long feeders, segregation of Class 1 and Class 2 |
A few practical heuristics: choose 48 V DC buses for longer continuous runs and consistent dimming; distribute remote drivers so each Class 2 circuit stays comfortably within the driver’s rated VA; and document where Class 2 boundaries start and end on one‑line diagrams for the AHJ.
Controls and compatibility
North American projects still rely heavily on 0–10 V dimming; DALI and Bluetooth Low Energy ecosystems such as Casambi appear frequently in galleries, retail, and offices. Whatever you choose, treat control interfaces as part of the listed system. For 0–10 V, ensure electrical compatibility between drivers and controllers and treat the control conductors as power‑limited unless your design specifically qualifies for other allowances under NEC 725. For DALI or BLE gateways, verify the gateway and associated power supplies are listed and that the enclosure and wiring class are documented in submittals. Industry groups publish helpful control references; a good starting point for the standards landscape is the ANSI and NEMA lighting controls resources: ANSI and NEMA lighting systems resources.
Photometrics and optics
Compliance does not replace design quality. Require CRI and CCT ranges that align with the program, specify beam options that match the visual tasks, and call out glare control accessories for comfort. For egress or emergency overlays, check that emergency drivers or control modes are listed and compatible with the track system, and include photometric files to demonstrate minimum illuminance where required by the authority.

Documentation package for submittals
Treat the submittal as your acceptance tool. Require, in a single indexed PDF, the NRTL directory page for each model, mark images and label samples, installation instructions referenced by the listing, one‑line schematics showing Class 2 boundaries and control paths, and a load schedule with expected current per segment and bus voltage. That package gives plan reviewers what they need to say yes.
Submittal and plan review checklist and spec note
Use this compact checklist to accelerate approvals and reduce RFI churn.
Certification evidence: ETL mark or equivalent NRTL mark for track, adapters, luminaires, and drivers; directory page for each model with standards listed. Include cETLus when Canadian review is anticipated.
Instructions and code tether: Manufacturer installation instructions cited in the listing; drawings and specs state installation shall conform to those instructions per NEC 110.3(B).
Electrical clarity: One‑line diagrams show Class 2 boundaries, driver locations, bus voltage, conductor classes, and control topology. Load schedule lists VA per segment and expected current.
Controls proof: Driver and dimmer or gateway compatibility notes plus certifications for gateways or control gear.
Field references: Label samples and mark images; ambient and enclosure limits; any conditions of acceptability called out in the listing.
Sample spec language you can adapt:
Provide ETL‑listed magnetic track lighting system evaluated to UL 2108 and UL 8750, with Class 2 power units evaluated to UL 1310. Submittals shall include public NRTL directory pages for track, adapters, luminaires, drivers, and controls. Installation shall comply with manufacturer instructions referenced by the listing and with the adopted edition of NFPA 70. Provide one‑line diagrams identifying Class 2 boundaries, driver locations, and control wiring classes. Where Canadian acceptance is required, provide cETLus documentation.
Common inspection failure modes and how to avoid them
Missing or mismatched listing evidence is the classic friction point. The model number on the installed equipment must match the NRTL directory entry in the submittal and any field labels should look like the samples you provided. Cross‑checking SKUs early prevents last‑minute scrambles.
Deviations from the instructions referenced by the listing are another frequent trigger. NEC 110.3(B) ties acceptance to those instructions, so mount drivers in the rated enclosure, respect ambient and spacing requirements, and route conductors as illustrated. It helps to annotate your drawings with these constraints so the field team has them at a glance. For the code context and official access point to NEC content, see the publisher’s landing page: NFPA 70 National Electrical Code landing.
A third issue is mixing conductor classes in shared spaces. Class 1 and Class 2 wiring cannot simply share a raceway or box unless explicitly permitted by Article 725 conditions. Keep them segregated or use rated constructions that the code allows, and document those decisions. Inspectors and plan reviewers often rely on educational material from professional bodies; you can find Class 2 segregation discussions through the IAEI’s portal: IAEI resources on Class 2 segregation.
Finally, watch control compatibility and voltage drop. For 0–10 V, confirm that drivers and controllers use compatible ranges and that control wiring is treated correctly as power‑limited. For long track runs, prefer 48 V DC where the system supports it and distribute loads so each Class 2 driver feeds a manageable segment with headroom.
Practical example using a neutral manufacturer reference
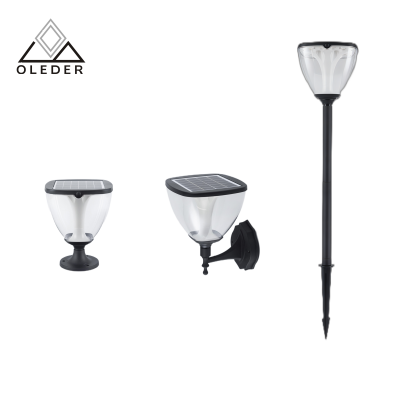
Here’s the deal—specifiers move faster when they can see a replicable pattern. Consider a gallery retrofit where long continuous runs and tight dimming uniformity are priorities. A Class 2, 48 V DC magnetic track was selected with remote drivers feeding three segments. The spec called for ETL listing to UL 2108 and UL 8750 with Class 2 drivers evaluated to UL 1310. The submittal bound acceptance to NEC 110.3(B) by citing and attaching the installation instructions, included Intertek directory pages for each model, and provided a one‑line diagram showing Class 2 boundaries, 0–10 V control paths, and expected current per segment. An approach like this can be executed with multiple manufacturers; for instance, see product families from Oleder Lighting for magnetic track systems and compliance‑oriented guidance on U.S. standards here: Oleder Lighting magnetic track guidance.
Resources and authoritative links for verification
Use these to verify models, cite standards, and orient your team and the AHJ.
OSHA parity and recognized labs under the NRTL program: OSHA NRTL Program and recognized labs.
ETL mark details and U.S. and Canada acceptance context: ETL Listed Mark acceptance and guidance and U.S. and Canada acceptance context.
Public directory for ETL listings to confirm exact model scopes: Intertek ETL public directory.
NFPA 70 context for 110.3(B), Article 411, and Article 725: NFPA 70 National Electrical Code landing.
Class 2 power unit standard overview: UL 1310 Class 2 Power Units.
System and LED equipment standards overviews: UL 2108 Low Voltage Lighting Systems and UL 8750 LED Equipment.
Inspector education on Class 2 segregation and wiring practices: IAEI resources on Class 2 segregation.
Canada acceptance context via accreditation of certification bodies: Standards Council of Canada accreditation portal.
Controls landscape and references for 0–10 V and related systems: ANSI and NEMA lighting systems resources.
Next steps for specifiers
Add one paragraph to Division 26 stating that magnetic track lighting shall be NRTL‑listed with model‑level traceability, that submittals must include public directory pages and installation instructions, and that installation shall conform to those instructions and the adopted NEC.
During design development, decide between integral and remote drivers using the table above; for long runs, prefer 48 V DC architectures when the listing permits.
Before bidding, assemble a submittal template with placeholders for directory links, mark images, one‑line diagrams showing Class 2 boundaries, and a load schedule. This single PDF becomes your acceptance package.
If you want a starter submittal package or sample spec language you can adapt to your practice, request a consolidated PDF set from your preferred manufacturer or rep team. For example‑driven guidance grounded in U.S. standards, you can contact the technical team through the Oleder site: Oleder Lighting.
Author introduction

Author
G'day My friends,
My name is Royce O'young, I’m the sales manager of Oleder Lighting. I have been in the LED lights industry for more than 16 years. Good at lighting design, track light & street light system configuration, and bidding technology support,and architecture inner decorating lighting advice . Feel free to contact us.I’m happy to provide you with the best service and products.
Email: r.oyoung@oleder-lighting.com | Wechat/WhatsApp: +86159 2057 0517.
Recommended Products

CATEGORIES
CONTACT US
Contact: Royce O'young
Phone: 15920570517
Tel: 0086-20-37716973
Email: r.oyoung@oleder-lighting.com
Add: Room 335,#1 Xianke 1st Rd, Honglitronic Group,Huadu ,510890, Guangzhou,P.R.C.
 Send Email
 Royce O'young
 Sales
Sales